
What is this page for?
Under Settings > AI assistant (this menu item is called This location once your organisation has several locations) you set up everything your assistant says and does during a call. You pick a section on the left and adjust the setting on the right. At the top of the page you turn the assistant's availability on or off.
How it works
- 1Set the availability
Choose Always on, Outside business hours only or Off at the top right. This change is active immediately, without a separate Save button.
- 2Choose a section
Click Basics, Knowledge base, Notes & callbacks, Book appointments, Contacts, Transfers, Follow-up opportunities or Extra instructions in the list on the left.
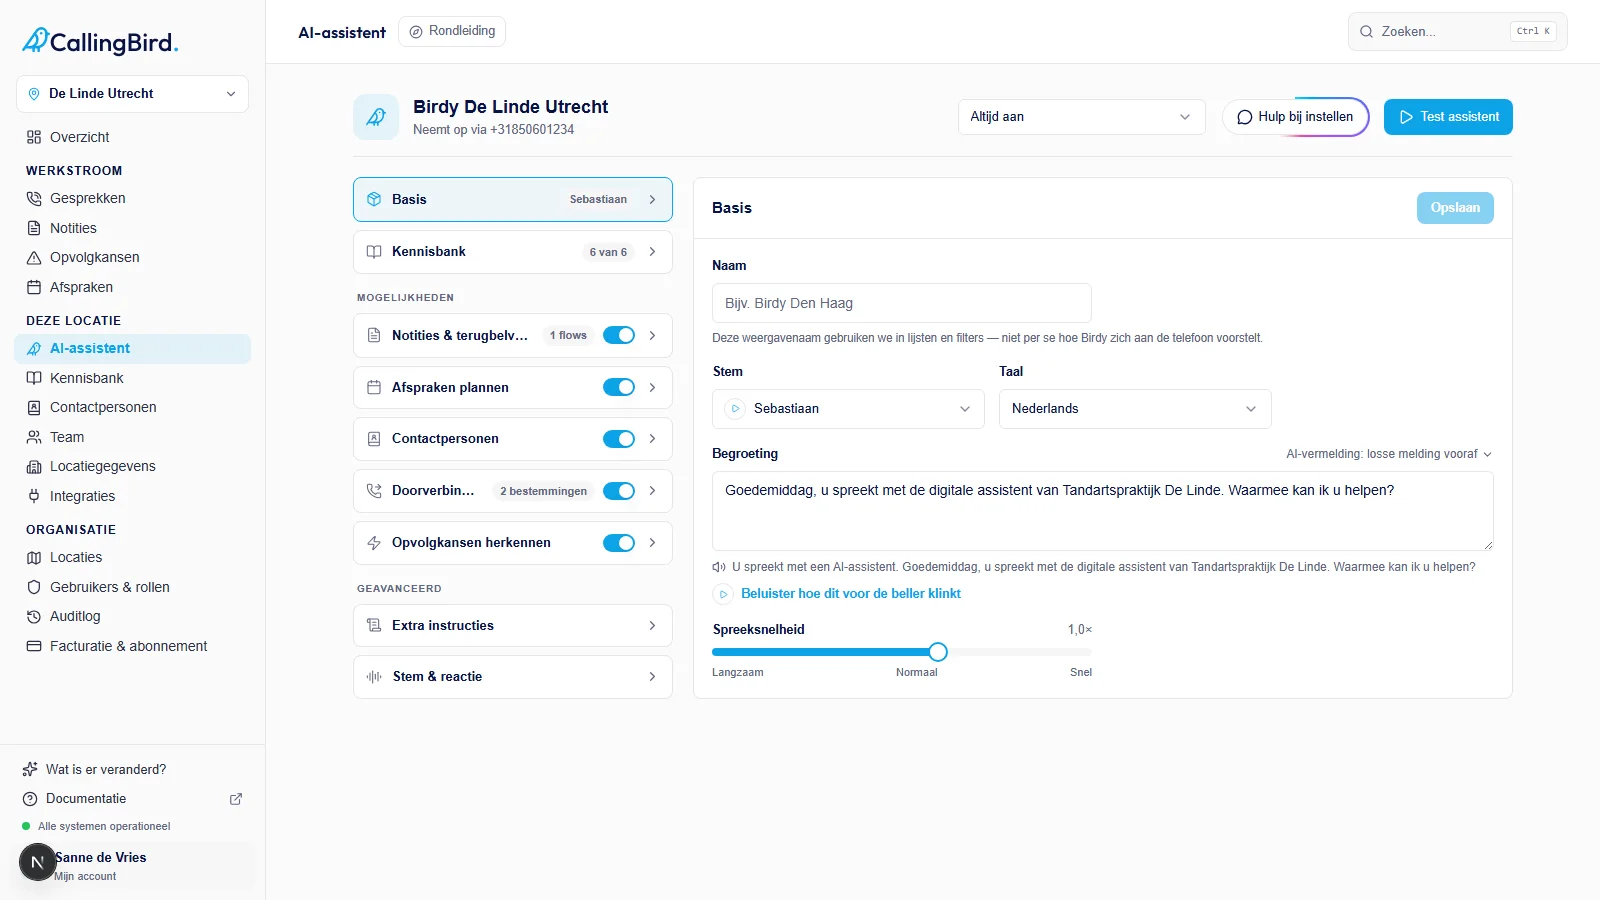
Choose a section on the left and update the panel on the right. - 3Adjust the setting and save
Change the fields in the open panel. Most sections have a Save button; switches, such as in Knowledge base and Contacts, are saved right away.
- 4Test your assistant
Click Test assistant at the top right for a test call in your browser, using your current settings.
- 5Ask Birdy for help
Click Setup help to discuss and adjust your settings together with Birdy. You can also ask Birdy this instead of opening a section yourself.
Basics
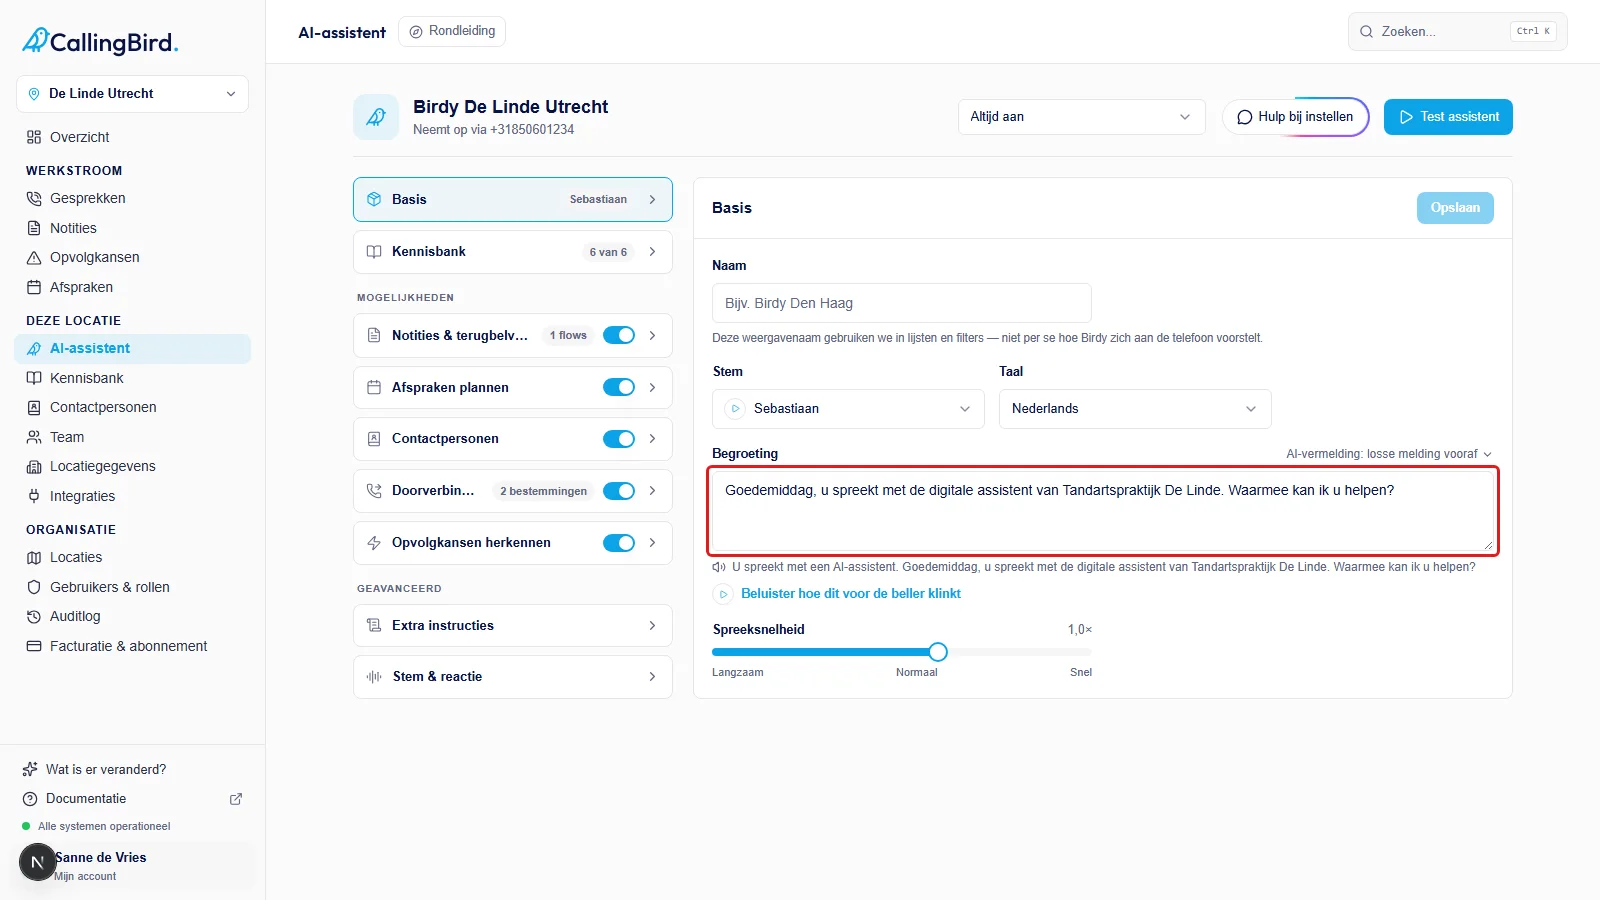
Choose the voice and language of your assistant and listen to a preview. Write the greeting callers hear at the start of the call and set the speaking speed.
Knowledge base
Choose which knowledge base items this assistant may use during calls. Click Manage in knowledge base to add or edit knowledge, which takes you to Knowledge base.
Notes & callbacks
Turn this on so the assistant can record requests such as callbacks as a note. Choose whether you receive an email for a new note and manage the note types that determine which details the assistant asks for per type of request.
Book appointments
Turn this on so the assistant can schedule appointments. This requires a connected calendar under Integrations. You then manage the scheduling system and the appointment types with their intake questions here.
Contacts
Decide which contact details the assistant may use during a call, such as first name, last name or email address. You manage the contacts themselves under Contacts.
Transfers
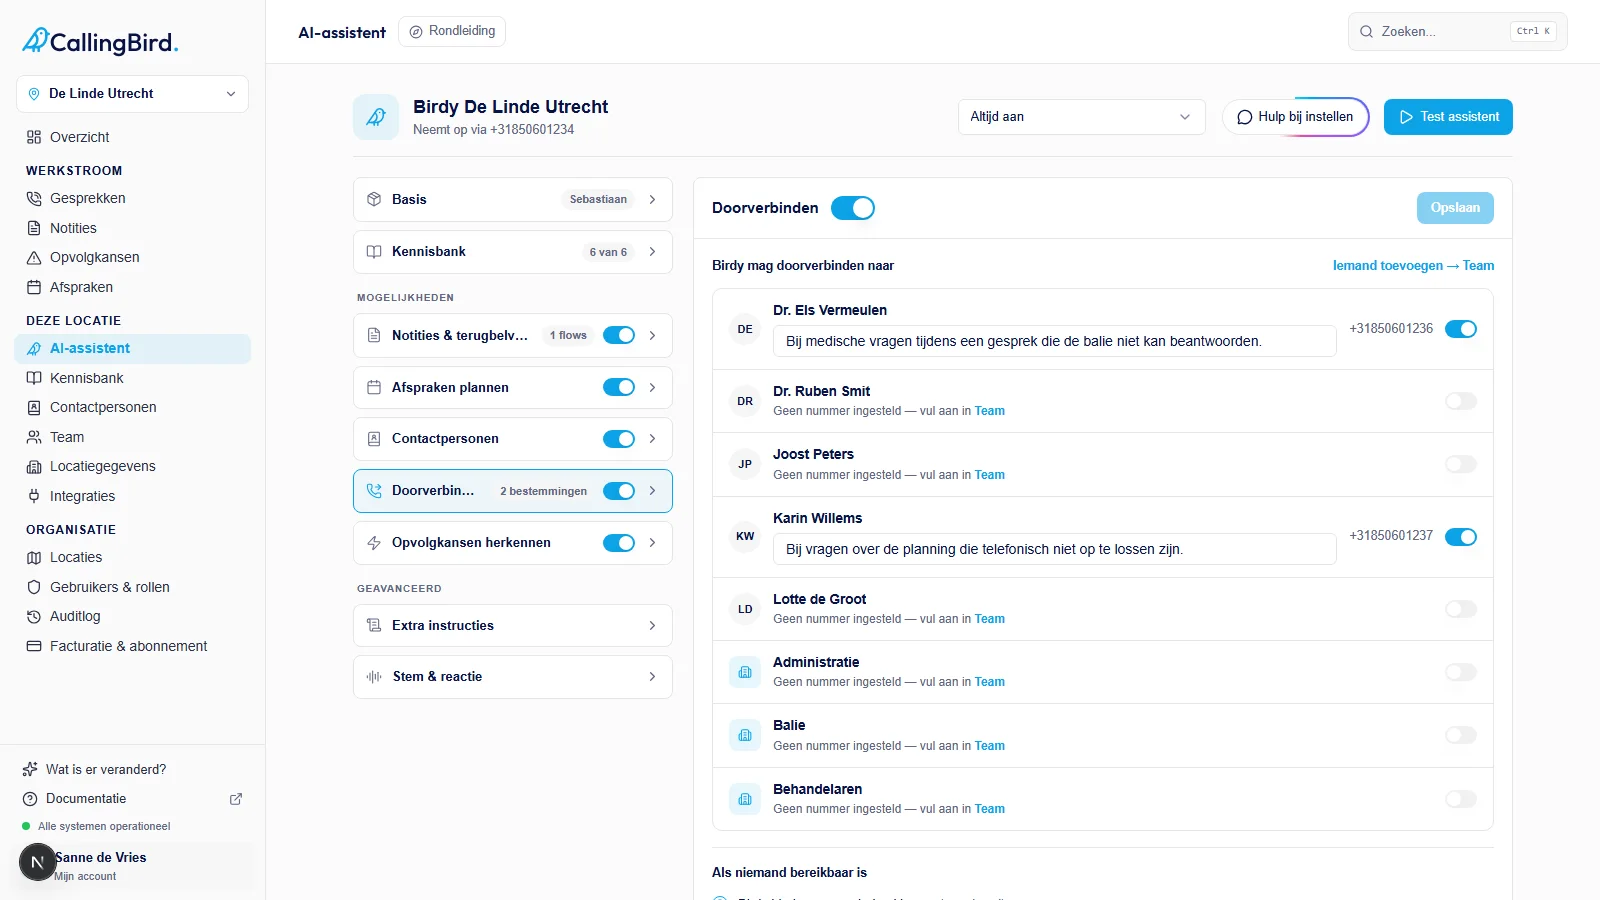
Turn this on so the assistant may transfer calls. Destinations come from Team; here you also choose what the assistant does if no one is available.
Follow-up opportunities
Turn on whether the assistant recognises and reports opportunities such as an interested caller, and choose which priority triggers an email notification.
Extra instructions
Write rules here that the assistant follows on every call, for example how it should handle urgent situations.